Skip to the content
LineSenseGUIDE
All topics (5 of 13)
  1. 1What LineSense does
  2. 2Where it works
  3. 3Before you start
  4. 4Where to put the cameras
  5. 5Set up the board
  6. 6Times, alerts and who is told
  7. 7Using the board every day
  8. 8A TV with no PC: HDMI
  9. 9Reports
  10. 10Where alerts and reports go
  11. 11How the times are measured
  12. 12When something looks wrong
  13. 13Setup checklist

LineSense › Guide › Set up the board, step by step

5Set up the board, step by step

You draw each register's line, its spot at the register and its cashier's place on the camera's picture, in the board's own settings. About two minutes a register.

Make the board

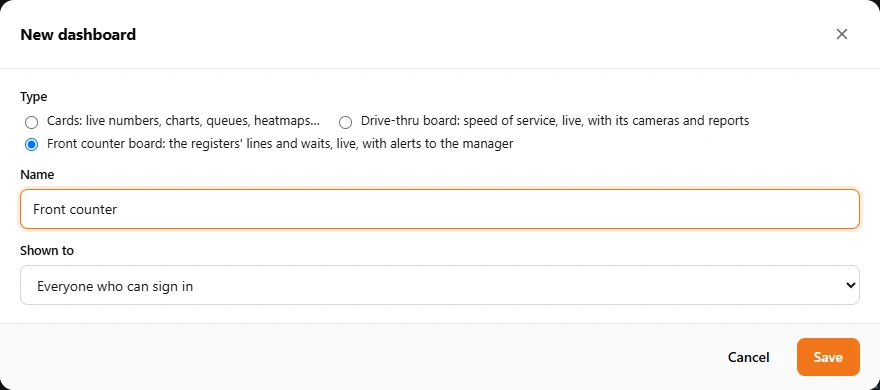
Open Insights and click + next to the dashboard tabs. Choose Front counter board, give it a name (it is the tab's name, and the report's), choose who sees it, and click Save.
LineSense guide: Set up the board, step by step

Choose the store

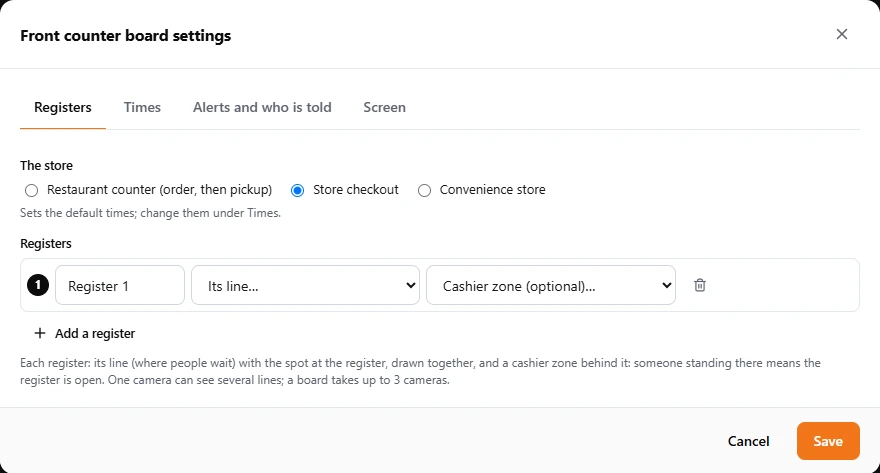
The board's settings open on Registers. Under The store choose Restaurant counter, Store checkout or Convenience store (section 2). It sets the default times.
LineSense guide: Set up the board, step by step

Draw register 1's line

In register 1's row, open Its line… and choose + Draw a new one…. In the window that opens, choose the Camera and type a Name (Register 1 line). Then click the corners of the line on the picture, on the floor where people stand, and click the first corner again to close it.

Each person the gateway sees has a box and a dot at their feet. A green dot is counted in the zone. Counted inside now must match the people you see waiting.
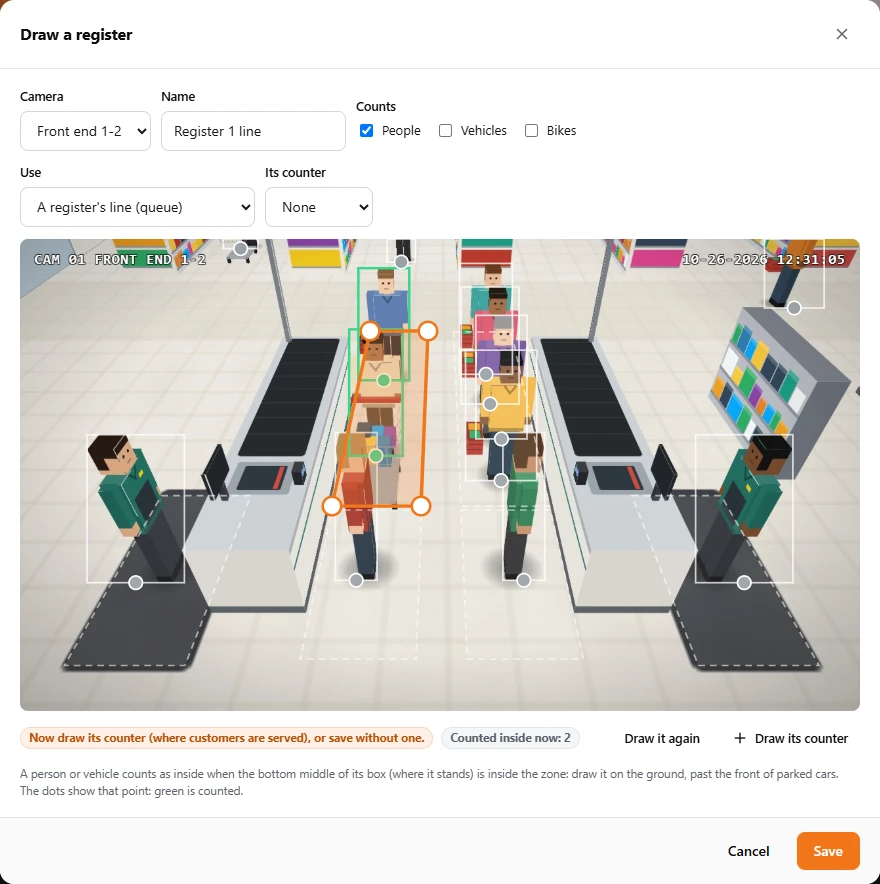
Register 1's line, drawn on the floor of the lane: Counted inside now: 2 , the two people waiting.
Register 1's line, drawn on the floor of the lane: Counted inside now: 2, the two people waiting.
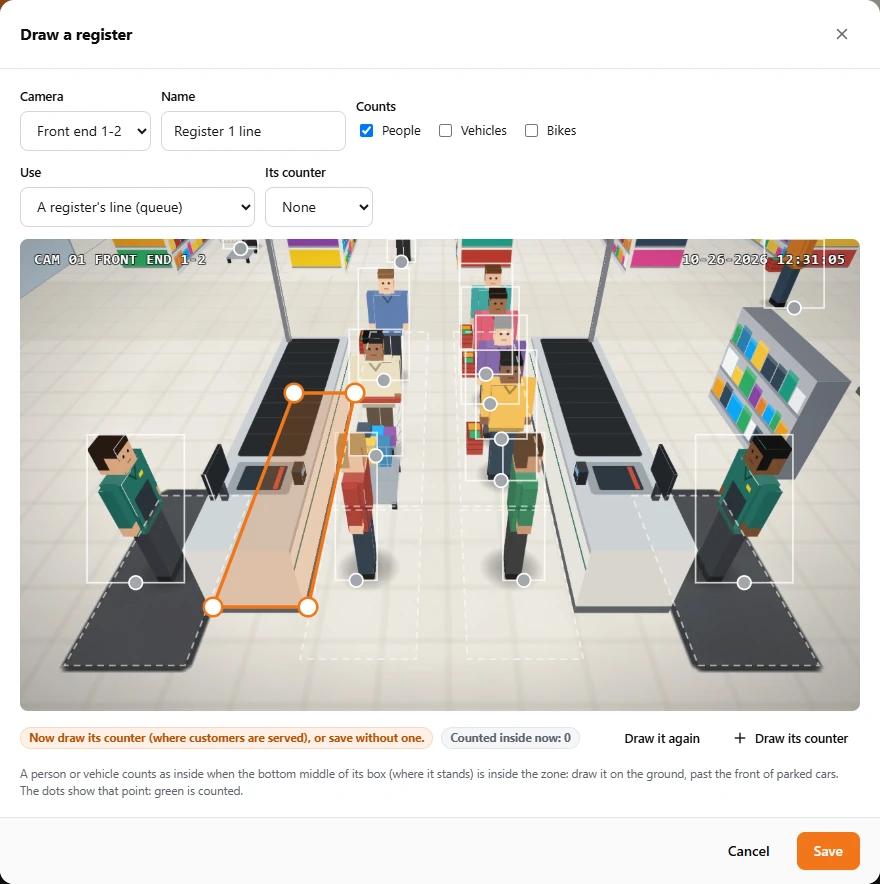
Draw it on the floor, not on the counterBelow, the same line was drawn over the counter beside it. Nobody stands there, so nobody is counted: Counted inside now: 0. Click Draw it again.
LineSense guide: Set up the board, step by step

Draw its spot at the register

Click + Draw its counter and draw, the same way, the spot where the customer stands to pay: the end of the lane, at the register. The wait ends when a customer steps in here, and their time at the register starts. Click Save.
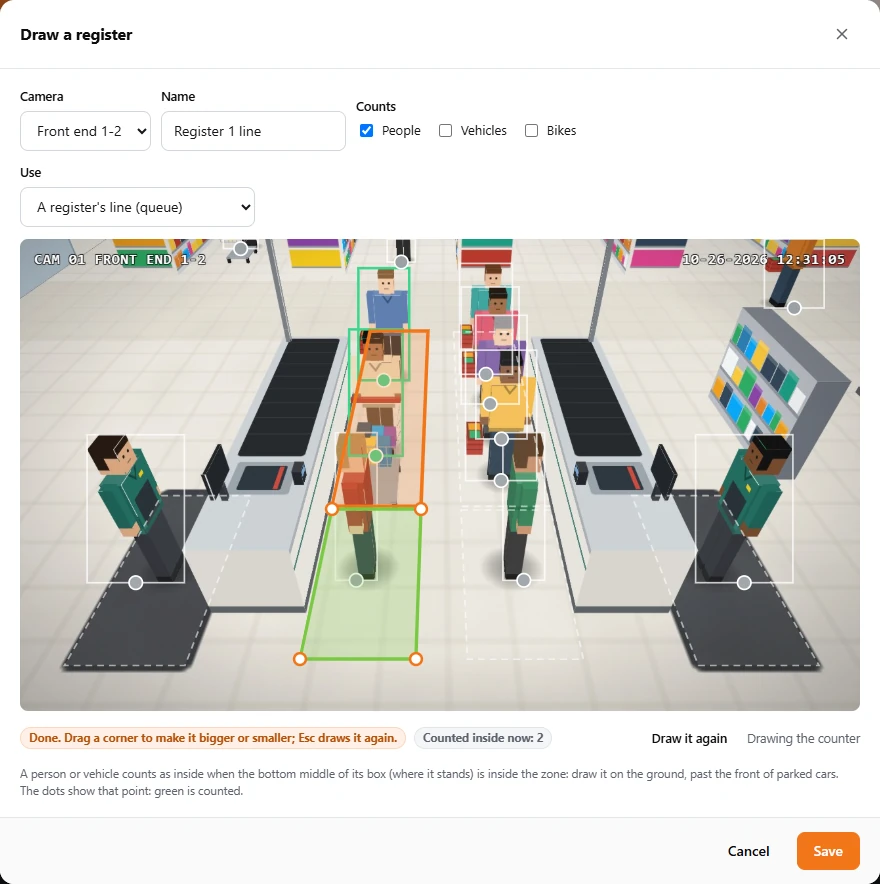
The line (green while drawn) and its spot at the register, together.

Draw the cashier's place

In register 1's row, open Cashier zone (optional)… and choose + Draw a new one…. Draw where the cashier stands, behind the register. Someone standing there means the register is open; nobody there, closed. That is what lets the board say "Register 3 is closed: open it?".
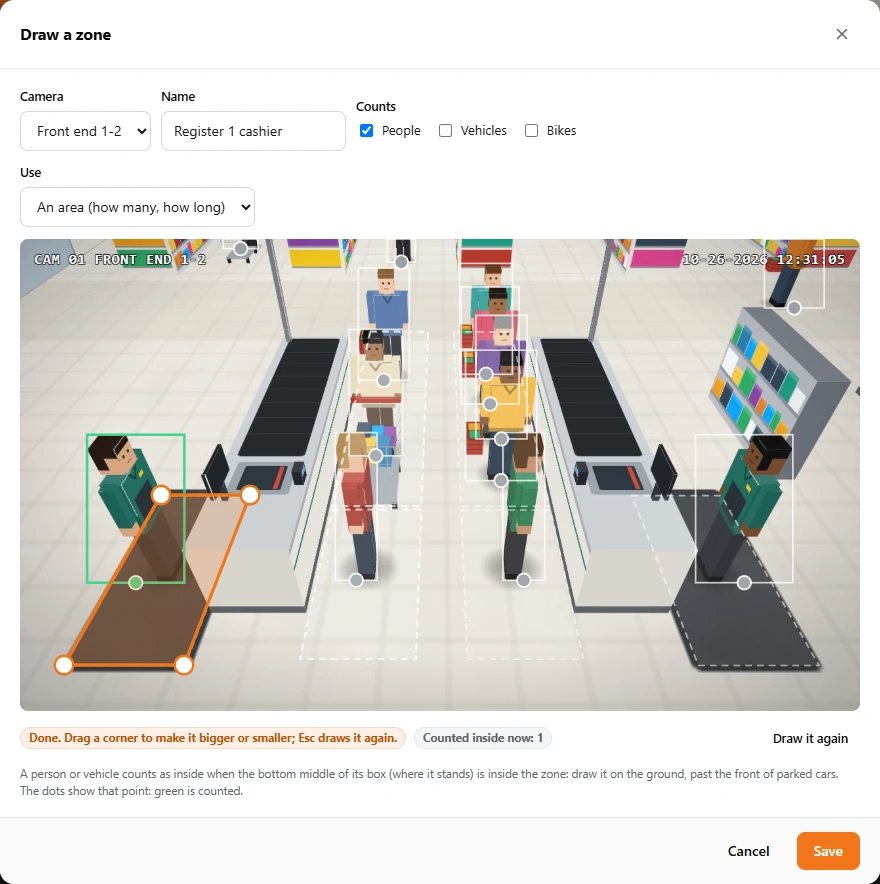
Register 1's cashier zone: Counted inside now: 1 , the cashier.
Register 1's cashier zone: Counted inside now: 1, the cashier.

Without a cashier zone, a register counts as open while it served someone in the last 10 minutes.

The other registers

Click + Add a register and do the same for each one. A zone drawn before (in Insights, or for another board) can simply be chosen from the lists. Name each register as your staff say it (Register 2, Lane 5, Pharmacy). Click Save.
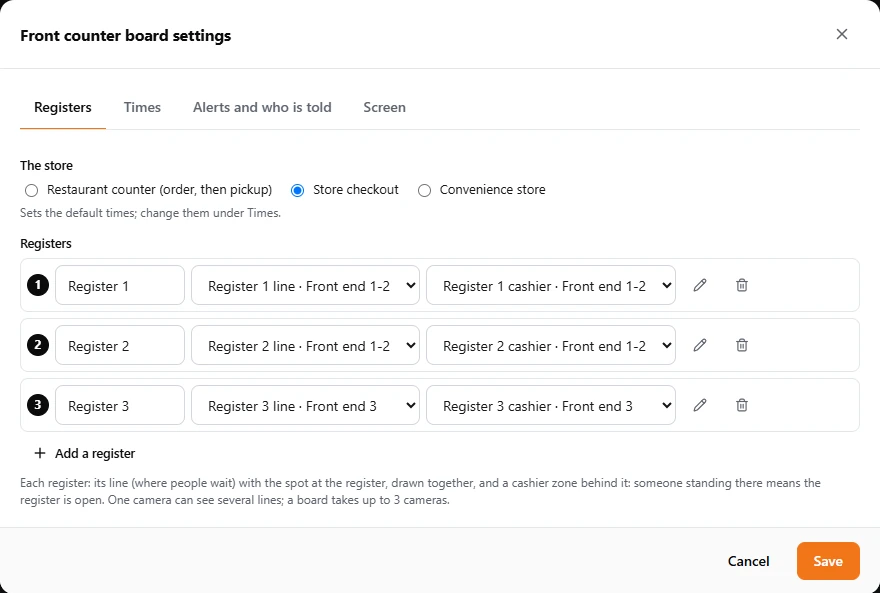
Three registers: each its line (with its spot at the register) and its cashier zone, on two cameras.
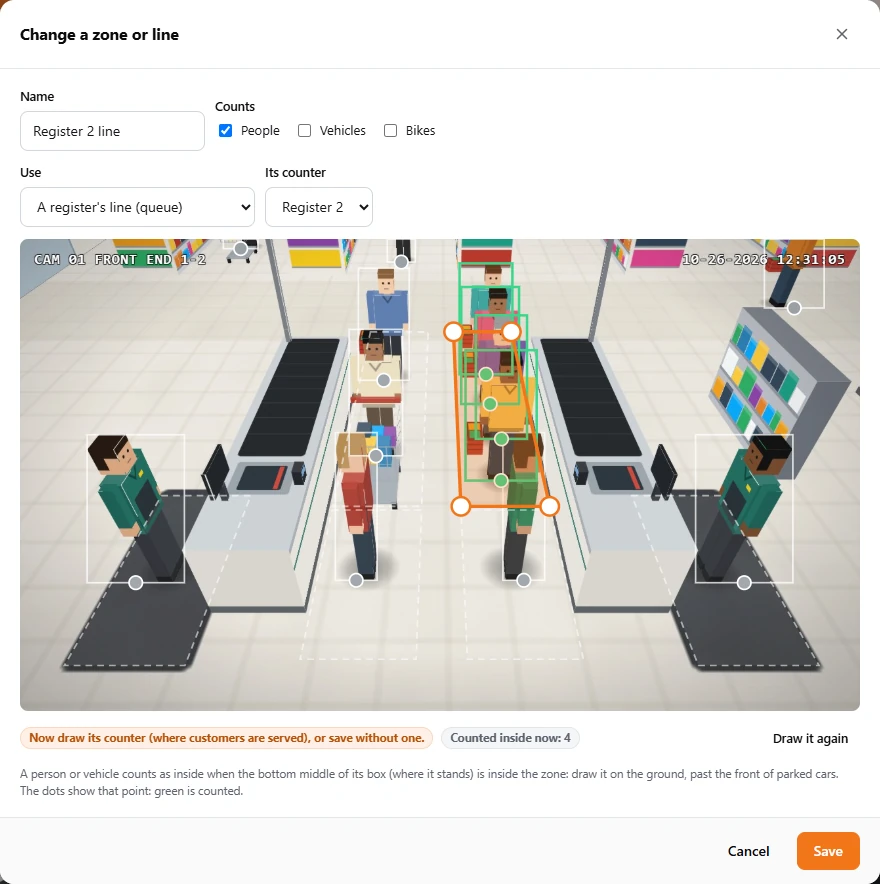
Check a register any timeIn the board's settings, the pencil next to a register opens its line on the live picture again, with who is counted now: the quickest check after a camera is moved or the counter is rearranged.
Register 2's line, opened with the pencil: four people waiting, all counted.

Stuck on a step?

iLink Professionals supports owners and installers. Call, or send us a message.